Composite Deck Installation Step by Step: How a Cincinnati Deck Gets Built Right
If your deck is 15 or 20 years old, there is a good chance the boards feel soft in spots and the railing wiggles when you lean on it. Many Cincinnati homeowners in that position start researching composite deck installation because they want the next deck to be the last one they build. The pitch sounds simple: no staining, no sealing, no splinters. The part nobody explains is what a proper installation actually involves, and why the steps underneath the boards matter more than the brand name printed on them.
This guide walks through the process the way a deck contractor would run the job, from tearing out the old structure to plugging the last screw head. If you understand these steps, you can tell a careful crew from a rushed one, and you can ask better questions before anyone picks up a saw.
One honest note before we start: composite is a surface material, not a structure. It still sits on a wood frame. A composite deck built on a rotten or undersized frame will fail just like a wood one, only with nicer boards on top.
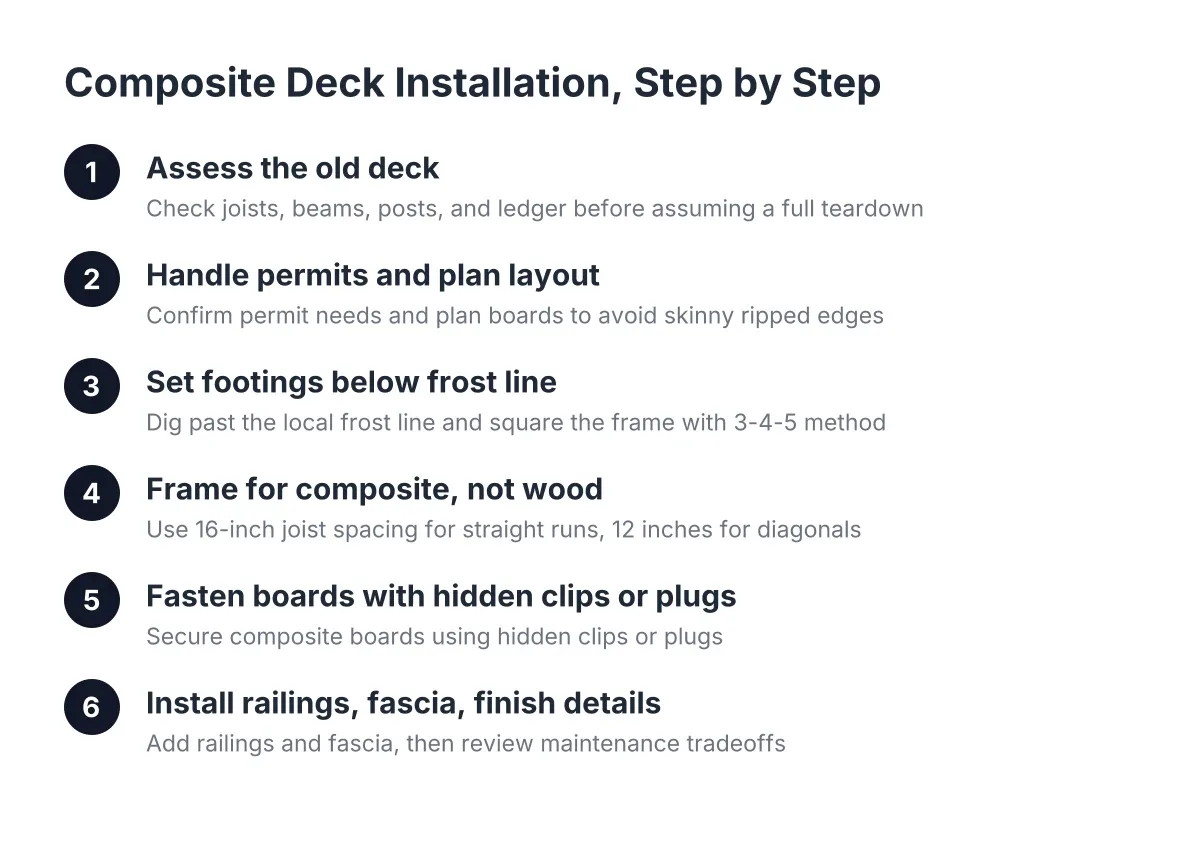
Step 1: Assess the Old Deck Before Assuming a Full Teardown
Start with the frame, not the boards. Soft decking and loose railings are symptoms; the real question is whether the joists, beams, posts, and ledger underneath are still sound. Probe the framing with a screwdriver at the ledger connection, the post bases, and anywhere boards meet the house. Solid wood resists; rot gives way.
The answer determines the whole project. If the frame is healthy and properly sized, deck resurfacing may be an option: strip the old boards and railing, keep the structure, and install composite on top. If the frame is compromised, you need full deck demolition and replacement. A contractor who quotes a rebuild without explaining what is wrong with your frame is skipping the most important conversation of the job.
For example, suppose a homeowner in Anderson Township has a 1998 deck with spongy boards but a dry, solid frame. In that scenario, resurfacing with composite might land in the mid four figures instead of the five-figure cost of a full rebuild, as a rough illustrative range. The same deck with a rotted ledger flips the math entirely, because the ledger is where decks fail dangerously.
If you are selling the house and an inspector flagged the deck, get the frame assessed before you decide anything. Resurfacing a sound frame is often the fastest path to a safe, presentable deck before a listing date.
Step 2: Handle Permits and Plan the Layout
In Hamilton County and most greater Cincinnati municipalities, a new or rebuilt deck needs a building permit, and footings get inspected before concrete is poured. A straight resurfacing job that keeps the existing frame often does not, but confirm with your local building department, because each city and township handles it differently. Skipping the permit creates a problem at sale time, exactly when the Pre-Listing Seller cannot afford one.
Next, plan the board layout on paper before ordering material. A professional layout starts and ends each run with full-width boards instead of a skinny ripped sliver along the house or the outer edge. That takes math up front, but it is one of the clearest visual tells of a planned job versus an improvised one. You can find free deck plans in PDF form online to study framing layouts, though anything structural should still be checked against Ohio code and your site.
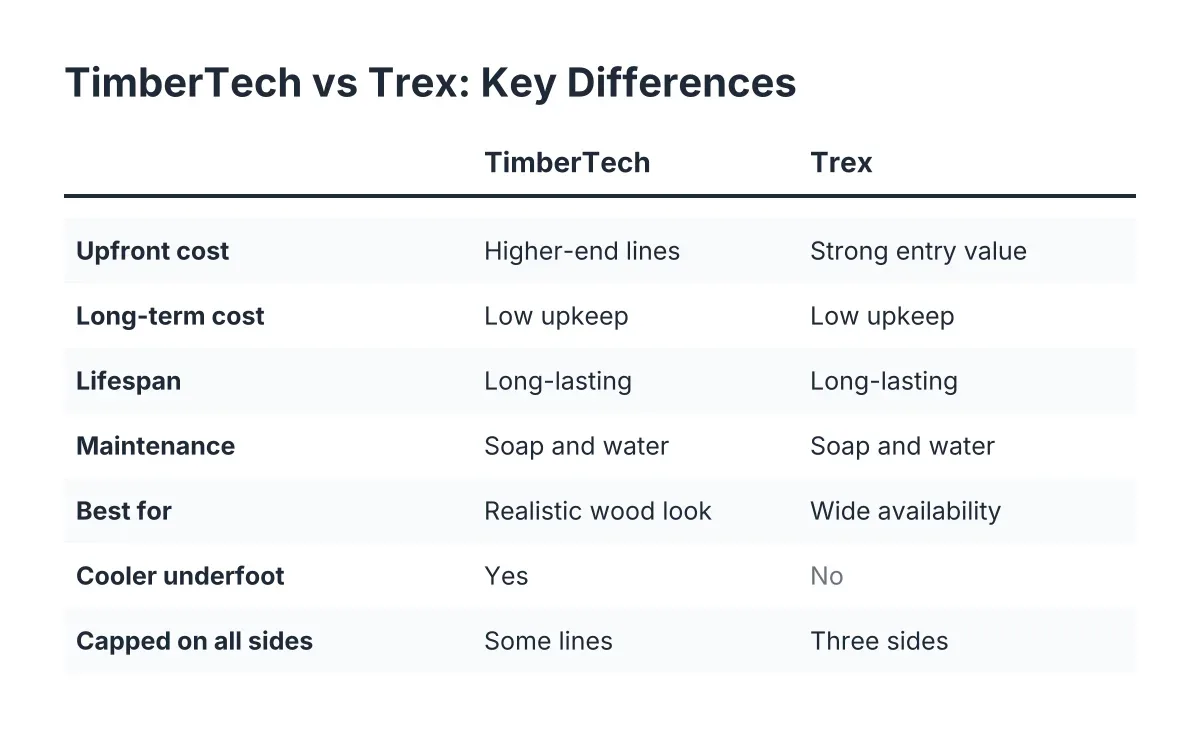
This is also when you choose boards. Composite decking colors now run from gray driftwood tones to variegated browns that read as hardwood, and the best composite decking lines, including Trex and TimberTech, offer multiple price tiers. Order grooved-edge boards for the field if you want hidden fasteners, and square-edge boards for any picture-frame border.
Step 3: Set Footings Below the Frost Line
Cincinnati winters cycle through freeze and thaw repeatedly, and that movement heaves shallow footings out of the ground. For any structural deck post, the footing hole must reach below the local frost line rather than relying on general above-grade depth rules, according to Decks.com. In this area, that means digging well past where a casual post hole would stop. Get this wrong and the deck racks, railings loosen, and doors to the deck start binding within a few winters.
For a ground-level deck or a deck and patio combination, adjustable deck pedestal systems can eliminate the need to pour concrete footers entirely, according to Bison Innovative Products. That option suits low platforms over existing patios, not elevated decks.
Once footings cure, square the frame layout using the 3-4-5 method: measure 4 feet along one line and 3 feet along the perpendicular line, and the diagonal between those marks should equal exactly 5 feet, per Decks.com. An out-of-square frame telegraphs through every board gap above it.
Step 4: Frame for Composite, Not for Wood
Composite boards flex more than wood, so most manufacturers require 16-inch joist spacing for straight runs and 12 inches for diagonal patterns. A frame built on 24-inch centers for old wood decking will leave composite feeling bouncy underfoot. This is the single most common reason a resurfacing candidate turns into a partial reframe.
Install every joist with the crown facing up; the crown is the slight upward arch along the board, according to Trex. Fasteners driven into pressure-treated lumber should be hot-dip galvanized or stainless steel, because the copper-based treatment chemicals corrode ordinary hardware, per the American Galvanizers Association. In addition, any cut or drilled hole in pressure-treated lumber should get an end-cut preservative sealer to protect the exposed untreated core, according to the American Wood Protection Association.
One more detail separates careful builders from fast ones. Applying waterproofing tape over the tops of the joists adds a moisture barrier where screws penetrate and water sits, a step professional deck builders take even though treated lumber already resists rot, according to TimberTech. On a frame you expect to outlast 25-year composite boards, that tape is cheap insurance.
Step 5: Composite Deck Installation—Fasten the Boards with Hidden Clips or Plugs
Here is where composite deck installation differs most from a wood deck. Grooved-edge boards accept hidden fastener clips that sit between the planks and screw into the joist, leaving no visible screw heads on the surface. The clips also set consistent gaps between boards automatically, which matters because composite expands and contracts with temperature more than wood does. Seat each clip snugly in the groove without overtightening into the joist; overdriven clips damage the board edge and the fastener's hold.
For the picture-frame border and stair treads, where screws must come down through the face, color-matched plug systems keep the surface clean. These systems include plugs made from the same material as the decking, so the fastener disappears visually, according to Trex. Most plug systems work across multiple composite brands, so your fastening choice does not lock you into one board line.
A few installation rules keep the surface flat and the warranty intact:
- Gap board ends per the manufacturer's spacing chart, which varies with the temperature on install day.
- Treat or seal cut composite ends where required before attaching adjoining framing like a rim joist.
- Never bridge a board over a missing joist; every end joint needs solid blocking or doubled framing beneath it.
- Start the first board dead straight off a chalk line, because every board after follows it.
There is a practical teardown benefit buried in this step, too. Clip-fastened composite comes apart far faster than screwed-down boards if a future owner ever needs to lift a section, which makes repairs under the deck surface simpler.
Step 6: Install Railings, Fascia, and Finish Details
Railings carry the safety load, so posts must anchor to the frame, not to the decking. Through-bolted posts with blocking resist the lean test that home inspectors apply; posts lagged into a single rim board are the loose railings you already know from your old deck. If you are selling, this is the detail an inspection report calls out most often.
Wrap the rim joists in matching composite fascia, add stair risers, and plug any remaining face screws. Then walk the whole surface checking gaps, plug seating, and board ends. A tidy composite decking installation should show no screw heads anywhere on the main field, with full boards at both edges and even gaps throughout.
Step 7: Know the Maintenance and the Honest Tradeoffs
Maintenance is where composite earns its price. Expect to blow off debris and hose the deck down a few times a year; there is no staining or sealing cycle, which is the chore that kills most wood decks in Ohio's wet springs. Composite also will not splinter or grow soft spots the way the deck you are replacing did.
The tradeoffs deserve equal airtime. Composite costs more up front than treated wood decking, and it recoups less at resale: the 2024 Cost vs. Value Report puts a new composite deck at about a 68% return versus 83% for the same deck in pressure-treated wood, per Remodeling Magazine. However, the value question is bigger than resale math; according to the National Association of Realtors, 81% of homeowners say they enjoy their homes more after adding a deck. If you plan to stay ten more years, low maintenance usually wins. If you are listing in 2026 and the frame is sound, a wood resurface may serve the sale better.
Composite boards also get hotter underfoot than wood in full sun, worth weighing for a south-facing pool deck. And none of this substitutes for a professional look at your specific structure; ledger attachment, footing depth, and load paths are exactly where a licensed deck builder earns the fee, and where DIY mistakes turn dangerous.
What a Careful Composite Deck Installation Looks Like When It Is Done
Stand back from a finished deck and you can read the quality of the work. Full-width boards at the house and the outer edge. No visible screws on the field, plugged and color-matched fasteners on the border. Even gaps that will stay even through a Cincinnati January. Railings that do not move when you shove them.
Everything on that list traces back to one of the seven steps above. The boards are the part you see; the footings, framing, and fastening are the parts that decide whether this deck is still solid when your current one would have been on its second rebuild. Whether you hire a deck contractor or price the job yourself, judge the plan by how it handles the steps you cannot see from a lawn chair.
If you need deck building and installation, Cincinnati Deck Pros can help.
Prefer to talk it through? Call (513) 613-3364 — a quick call is usually the fastest way to get a straight answer for your situation.